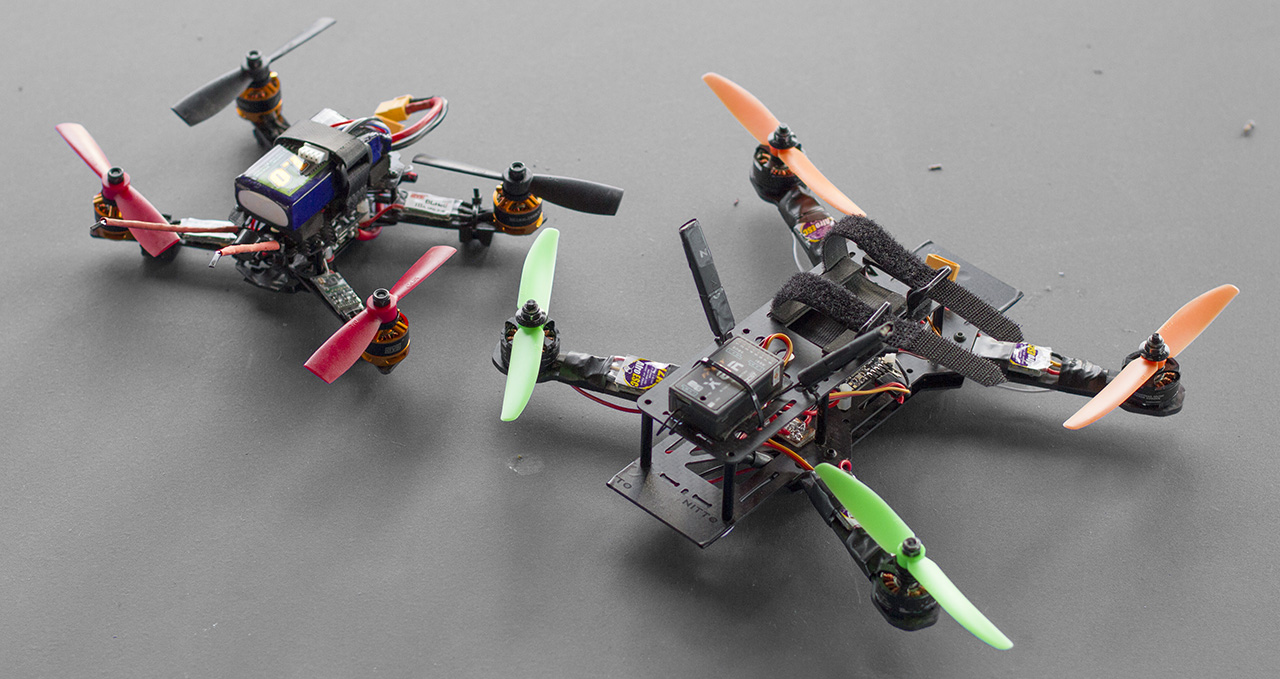
One thing I’ve found when flying the 250 miniquad is that I’m very cautious while flying. The 250 is heavy enough that in a crash it can cause a fair bit of damage both to itself and to anything it hits. This cautiousness is holding me back, I’m not learning how to fly as quickly as I could be.
So I’ve been wanting to go smaller. I bought a tiny little Blade Pico, which has been good fun, but it controlled very differently, and had short flight times. So I just finished building a quad with a 180 (180mm diagonal distance between the props, instead of 250mm) frame. I’ll put a full parts list below.
The build went quite well. The frame itself was easy to put together. The smaller size made cramming everything in a fair bit more difficult than it was with the 250. I had to cut the leads of the motors and ESCs very short, and I had issues with the connectors to the flight controller hitting the ceiling of the frame. I actually ended up removing part of the frame with a hacksaw to give enough room for those connectors to poke out the top. Next time I would get right angle headers so the connectors could go in sideways.
The frame came with a little PDB, and that made the wiring a lot easier. The built in 5v BECs on the PDB are great, though I don’t see why you’d need two of them in most cases. The arrangement of the positive and negative terminals on the PDB was a bit weird too, requiring the wires to the ESCs to cross over the board.
I’m still waiting on a couple of smaller batteries, as the 1000mAh nanotech I’m using weighs half as much as the rest of the quad combined, taking the total from 200g up to 300g.
When I took it for the first flight, it wobbled uncontrollably. I had flashed it with CleanFlight, and the default PIDs were obviously designed for larger less responsive quads. It took me a fair bit of googling to figure that out, as I hadn’t played with the PID settings before, but once I turned down all the P values it came right. I also had some yaw drift, so it would slowly rotate around. In CleanFlight I could see that this was because the Taranis was sending around 1510 for pitch/yaw/roll and not 1500 as it should. I don’t know why this was, but I simply adjusted the trim to compensate.
Once I had all that sorted, it was pretty amazing to fly. A lot more responsive and snappy than the 250, and far more crashable. I almost immediately started doing barrel rolls and stuff, and crashed at full speed into short grass a few times with no prop damage. Unfortunately, after several more high speed crashes into the ground, the frame couldn’t handle it and one of the screws between the bottom plate and an aluminum spacer snapped. I think one of the ESCs may have been damaged in the process too, but I’ll look into that tomorrow.
I’m also having issues with vibrations causing screws to come loose. I think the frame with it’s rather sparse M2 screws and thin top and bottom plates is a bit too fragile and bendy to handle the forces and vibration involved. So I’ll be trying out a stronger 180 sized frame.
But it was super fun to fly, and I’m going to fix it one way or another and fly a 180 quad again. It was a harder build than the 250, but definitely easier to learn to fly with. It’s kind of totally nuts how responsive and powerful it was for such a tiny package, and how quickly it can spin around and zoom far away.
I’m not sure if it’s worth attempting to squeeze FPV onto a 180 sized quad or not, but for now I’m still flying line of sight anyway, as I’m still waiting on a pair of Fat Shark goggles and a camera for the 250.
Build parts list (prices in USD):
- Diatone Blade 180 Class Micro Multirotor Frame Kit - $14.91
- Naze32 Flight Controller - $23.99
- Motors and ESCs came in a pack on sale - $56.99
- DAL 4045 props - $6.28
- FrSky D4R-II 4ch 2.4Ghz ACCST Receiver - $20.79
On top of this there was heat shrink, cable ties, a buzzer, battery, velcro strap, XT60 connector, lock nuts for the motors, and a few spacers and tape etc, and I’m using the Taranis x9d plus transmitter. All up this build cost about $130 USD if you don’t include a battery and the transmitter. A few more notes:
- I found I could turn two of the ESCs upside down to reverse the rotation, as a clean way of crossing two wires. I’ve seen in multiple places on the internet people saying “The rotation is random, you need to test”. However I have found with both quads I have built that if you put the ESC with the label on top and wire them straight to the motors without any crossing, the motors spin anticlockwise. So you can just turn over the front left and back right ESCs.
- I put the receiver on the bottom of the quad in case you’re wondering where it is
- I learnt from last time to orientate the flight controller so that the USB port is pointing out the side. This required a simple 90 degree rotation setting in CleanFlight
- I used bits of foam from the packaging that my 250 flight controller came in to raise the battery so it wouldn’t sit on the wires connecting to the flight controller, and also as feet on the arms.
- I had luckily ordered a bunch of self locking nuts for use on the motors. If I didn’t have those, the propellers would have fallen off immediately given the terrible nuts that the motors came with, and the crazy thick propellers.